A well-structured knowledge base helps your users find answers quickly, reduces support tickets, and improves your product’s SEO. With CandyDocs, creating and managing knowledge base articles is simple, flexible, and fully branded for your product.
In this guide, we’ll walk you through the exact steps to create a knowledge base article using the CandyDocs dashboard.
Why Use CandyDocs for Your Knowledge Base?
CandyDocs lets you manage all your product content—knowledge base, roadmap, feedback, changelogs, and API docs—from a single dashboard. Your knowledge base articles are:
Easy to create and edit
Fully SEO-optimized
Organized with categories and slugs
Branded to match your product
Accessible to both users and search engines
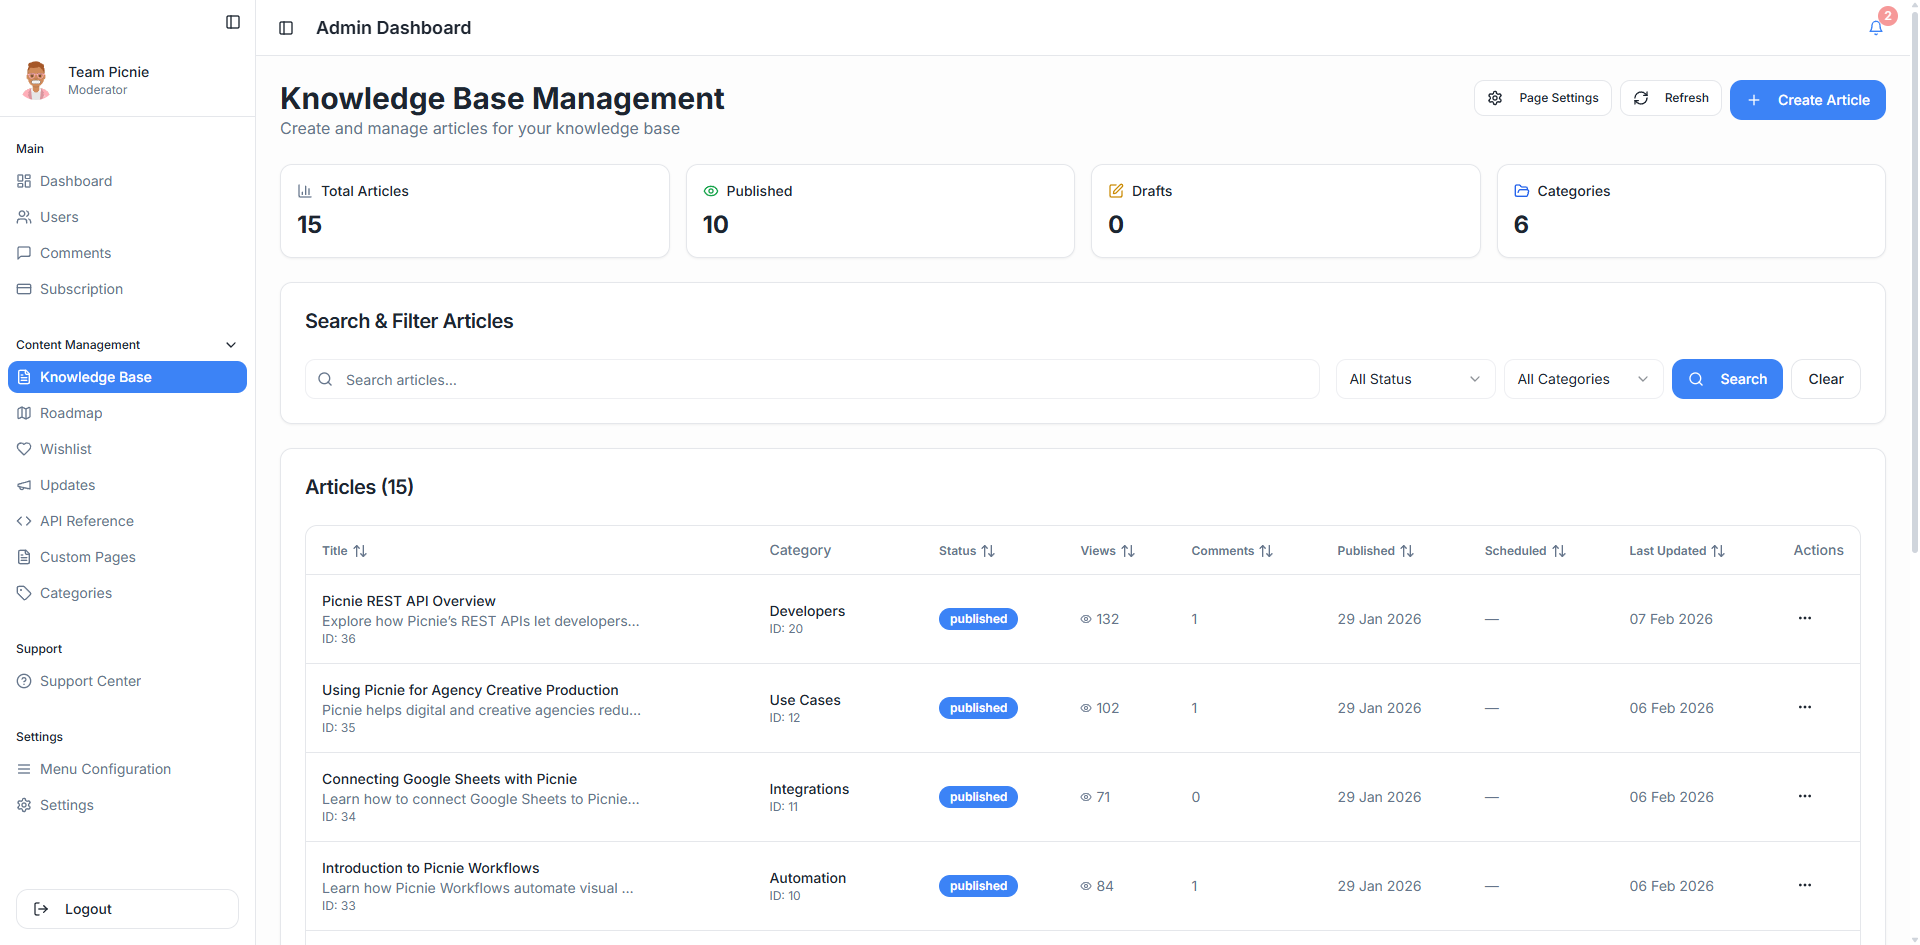
Step 1: Open the CandyDocs Dashboard
Log in to your CandyDocs dashboard and select your product workspace.
From the left-hand sidebar, navigate to:
Knowledge Base → Articles
This is where all your existing articles are listed and managed.
Step 2: Click “Create Article”
Click on the Create Article button to start a new knowledge base article.
This opens the article editor where you’ll add your content and settings.
Step 3: Add the Article Title and Excerpt
Start by filling in:
Title – Clear and descriptive (this appears as the main heading)
Excerpt – A short summary shown in article lists and previews
Tips:
Use simple, user-focused language
Keep titles action-oriented (e.g., How to Reset Your Password)
Write excerpts that explain the value of the article in 1–2 lines
Step 4: Write the Article Content
Use the rich text editor to write your knowledge base content. You can add:
Headings and subheadings
Bullet points and numbered steps
Code blocks and inline code
Links and formatted text
Images and screenshots
Structure your content so users can quickly scan and understand it.
Best practices for content structure:
Start with a short introduction
Use clear section headings
Break long paragraphs into bullets
Add screenshots where steps may be confusing
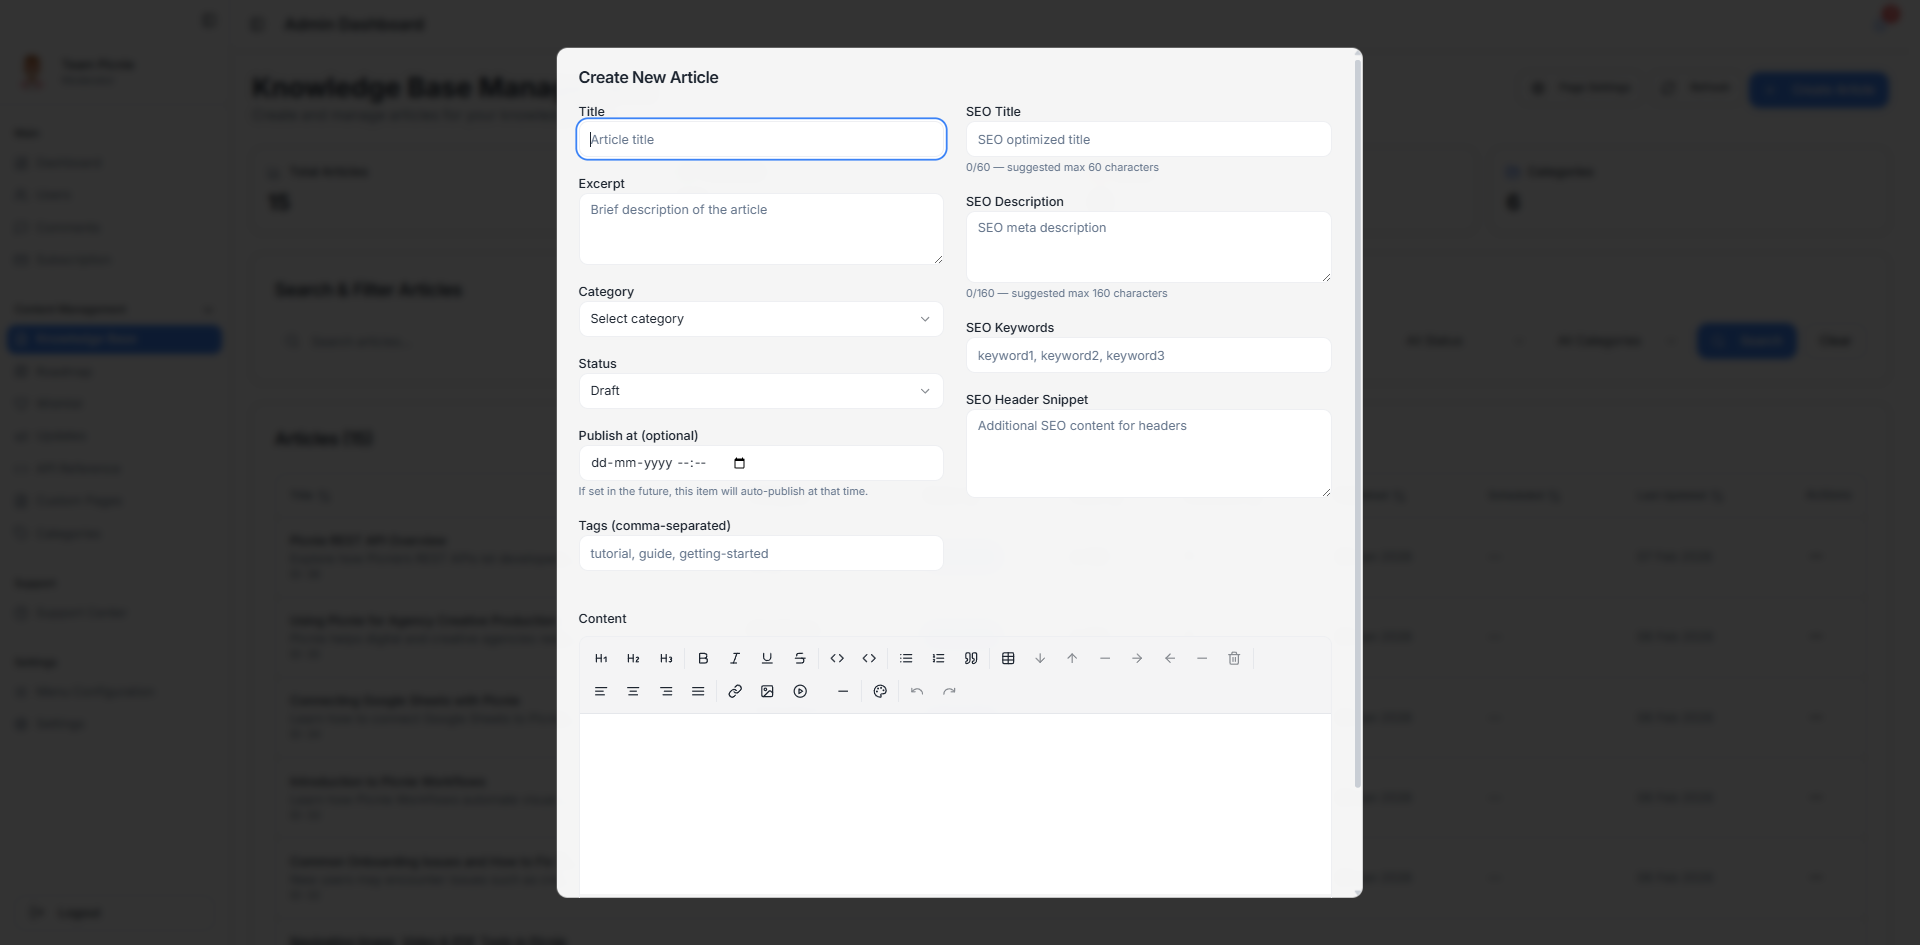
Step 5: Choose a Category
Categories help organize your knowledge base and make articles easier to find.
Select an existing category or create a new one, such as:
Getting Started
Account & Billing
Integrations
API Documentation
Troubleshooting
A well-organized category structure improves both usability and SEO.
Step 6: Customize the URL Slug
CandyDocs automatically generates a URL slug from your title, but you can edit it.
Example:/knowledge-base/how-to-create-an-article
Tips for SEO-friendly slugs:
Keep it short and readable
Use lowercase words
Avoid special characters
Include relevant keywords
Step 7: Configure SEO Settings
Scroll to the SEO section and add:
SEO Title – Appears in search engine results
Meta Description – Short summary for search engines
These fields help your articles rank better on Google and drive organic traffic.
SEO best practices:
Keep SEO titles under 60 characters
Keep descriptions between 150–160 characters
Include your main keyword naturally
Step 8: Set Article Visibility
Choose whether the article should be:
Published – Visible to users immediately
Draft – Saved but not visible yet
Drafts are useful when you’re still reviewing content or waiting to add screenshots.
Step 9: Save and Publish
Once everything looks good, click Save or Publish.
Your knowledge base article is now live and accessible through your CandyDocs knowledge base.
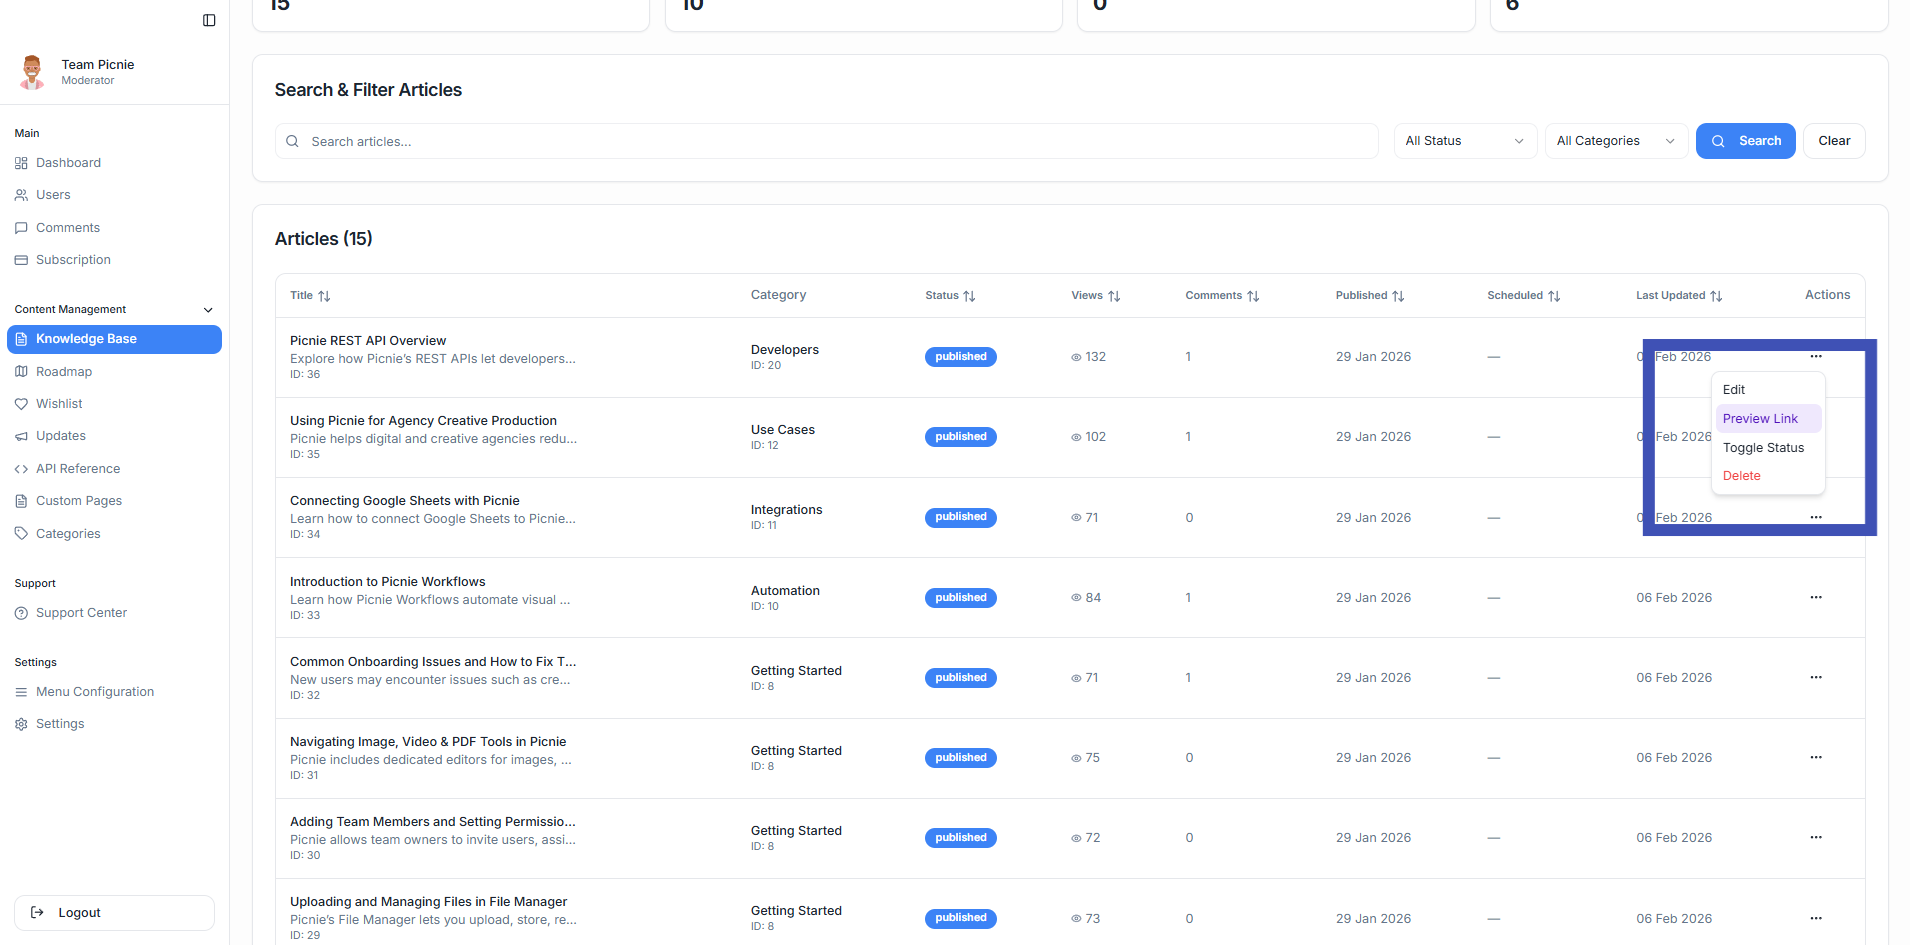
Managing and Updating Articles
You can edit, update, or unpublish articles anytime from the dashboard. Keeping your knowledge base updated ensures users always see accurate information as your product evolves.
Regular updates also help improve SEO and user trust.
Final Thoughts
Creating a knowledge base article in CandyDocs is fast, flexible, and powerful. With clean structure, SEO controls, and a modern editor, you can build a self-serve help center that grows alongside your product.
Start documenting today and give your users the answers they need—right when they need them.